
Great Good Fine Ok’s LED Suit
a custom jacket, pants, and chest piece with over 500 leds - controlled wirelessly VIA midi MESSAGES
This project was a continuation of my previous collaboration with the Synth Pop band Great Good Fine OK. Jon (GGFO’s front man) asked if I could help realize his vision of an LED Jacket that could be controlled wirelessly via MIDI, similar to the Stage Lights I had made for them the year prior.
The end result included not only a Jacket, but Pants, an acrylic Chest Piece (in the shape of the band’s Logo: The Body Diamond) and a Virtual Version of the whole thing (for Mac OS) so they could easily program it without having to setup the suit each time.
DEMOS
Great Good Fine OK — “Gone”
Here’s Luke from Great Good Fine OK showing off his insane ability to program the suit’s visuals for their song “Gone” using Ableton Live to automate MIDI clips that synchronize with the music. Sorry for the terribly low quality, I received this video in a text message.
And here’s a clip of the actual live performance. I really like what they did for the intro. Added a bit of theater to the show and acted as a great transition back on stage since this song was their first encore.
One thing to call out in this video though: At this point in the tour, some of the LEDs had gotten dislodged from their placements in the jacket so they weren’t as visible. And the left arm was having some issues lighting up. This was unfortunately a product of having to get it done on a short time frame, which meant the garment maker ended up having to adhere the LEDs to the inside of the suit (instead of me being able to do it and make it more robust). But the Chest Piece worked great the whole tour!
How it works
There are 3 strings of LEDs in the jacket, 2 in the chest piece, and 2 more in the legs. Each one can be controlled independently via MIDI CC and Note messages on separate MIDI channels, or all in unison via the Global MIDI Channel. This makes it intuitive for any musician that has experience drawing automation curves in Ableton to build complex animations for the suit that are beat synchronized to their songs.
Here’s a video showing some very basic Ableton Live programming of MIDI CC Messages to control the LEDs using the Virtual Suit Mac App that I built to make programming easy.
More Demos
Here are a couple more examples of what types of animations and effects look like. I am just using an M-Audio Trigger Finger (a $50 MIDI controller) to control the various LED parameters and trigger animations. The nice thing about this system is the simplicity of being able to use any MIDI controller or keyboard to get up and running. Of course Ableton is the best way to make really interesting and intricate animations.
IN-DEPTH LOOK AT EACH COMPONENT
Components:
— Jacket / Pants
— Chest Piece
— Wireless MIDI Transmitter
— Virtual Jacket / Chest Piece (for easy testing and programming)
JACKET / PANTS
The garments (jacket and pants) were designed and sewn by a costume designer in NYC. My job was to outfit the entire thing with as many LEDs as possible and build the battery power supply and “brain” board into the suit. Here’s a demo showing the inner workings of the system.

Internal Components
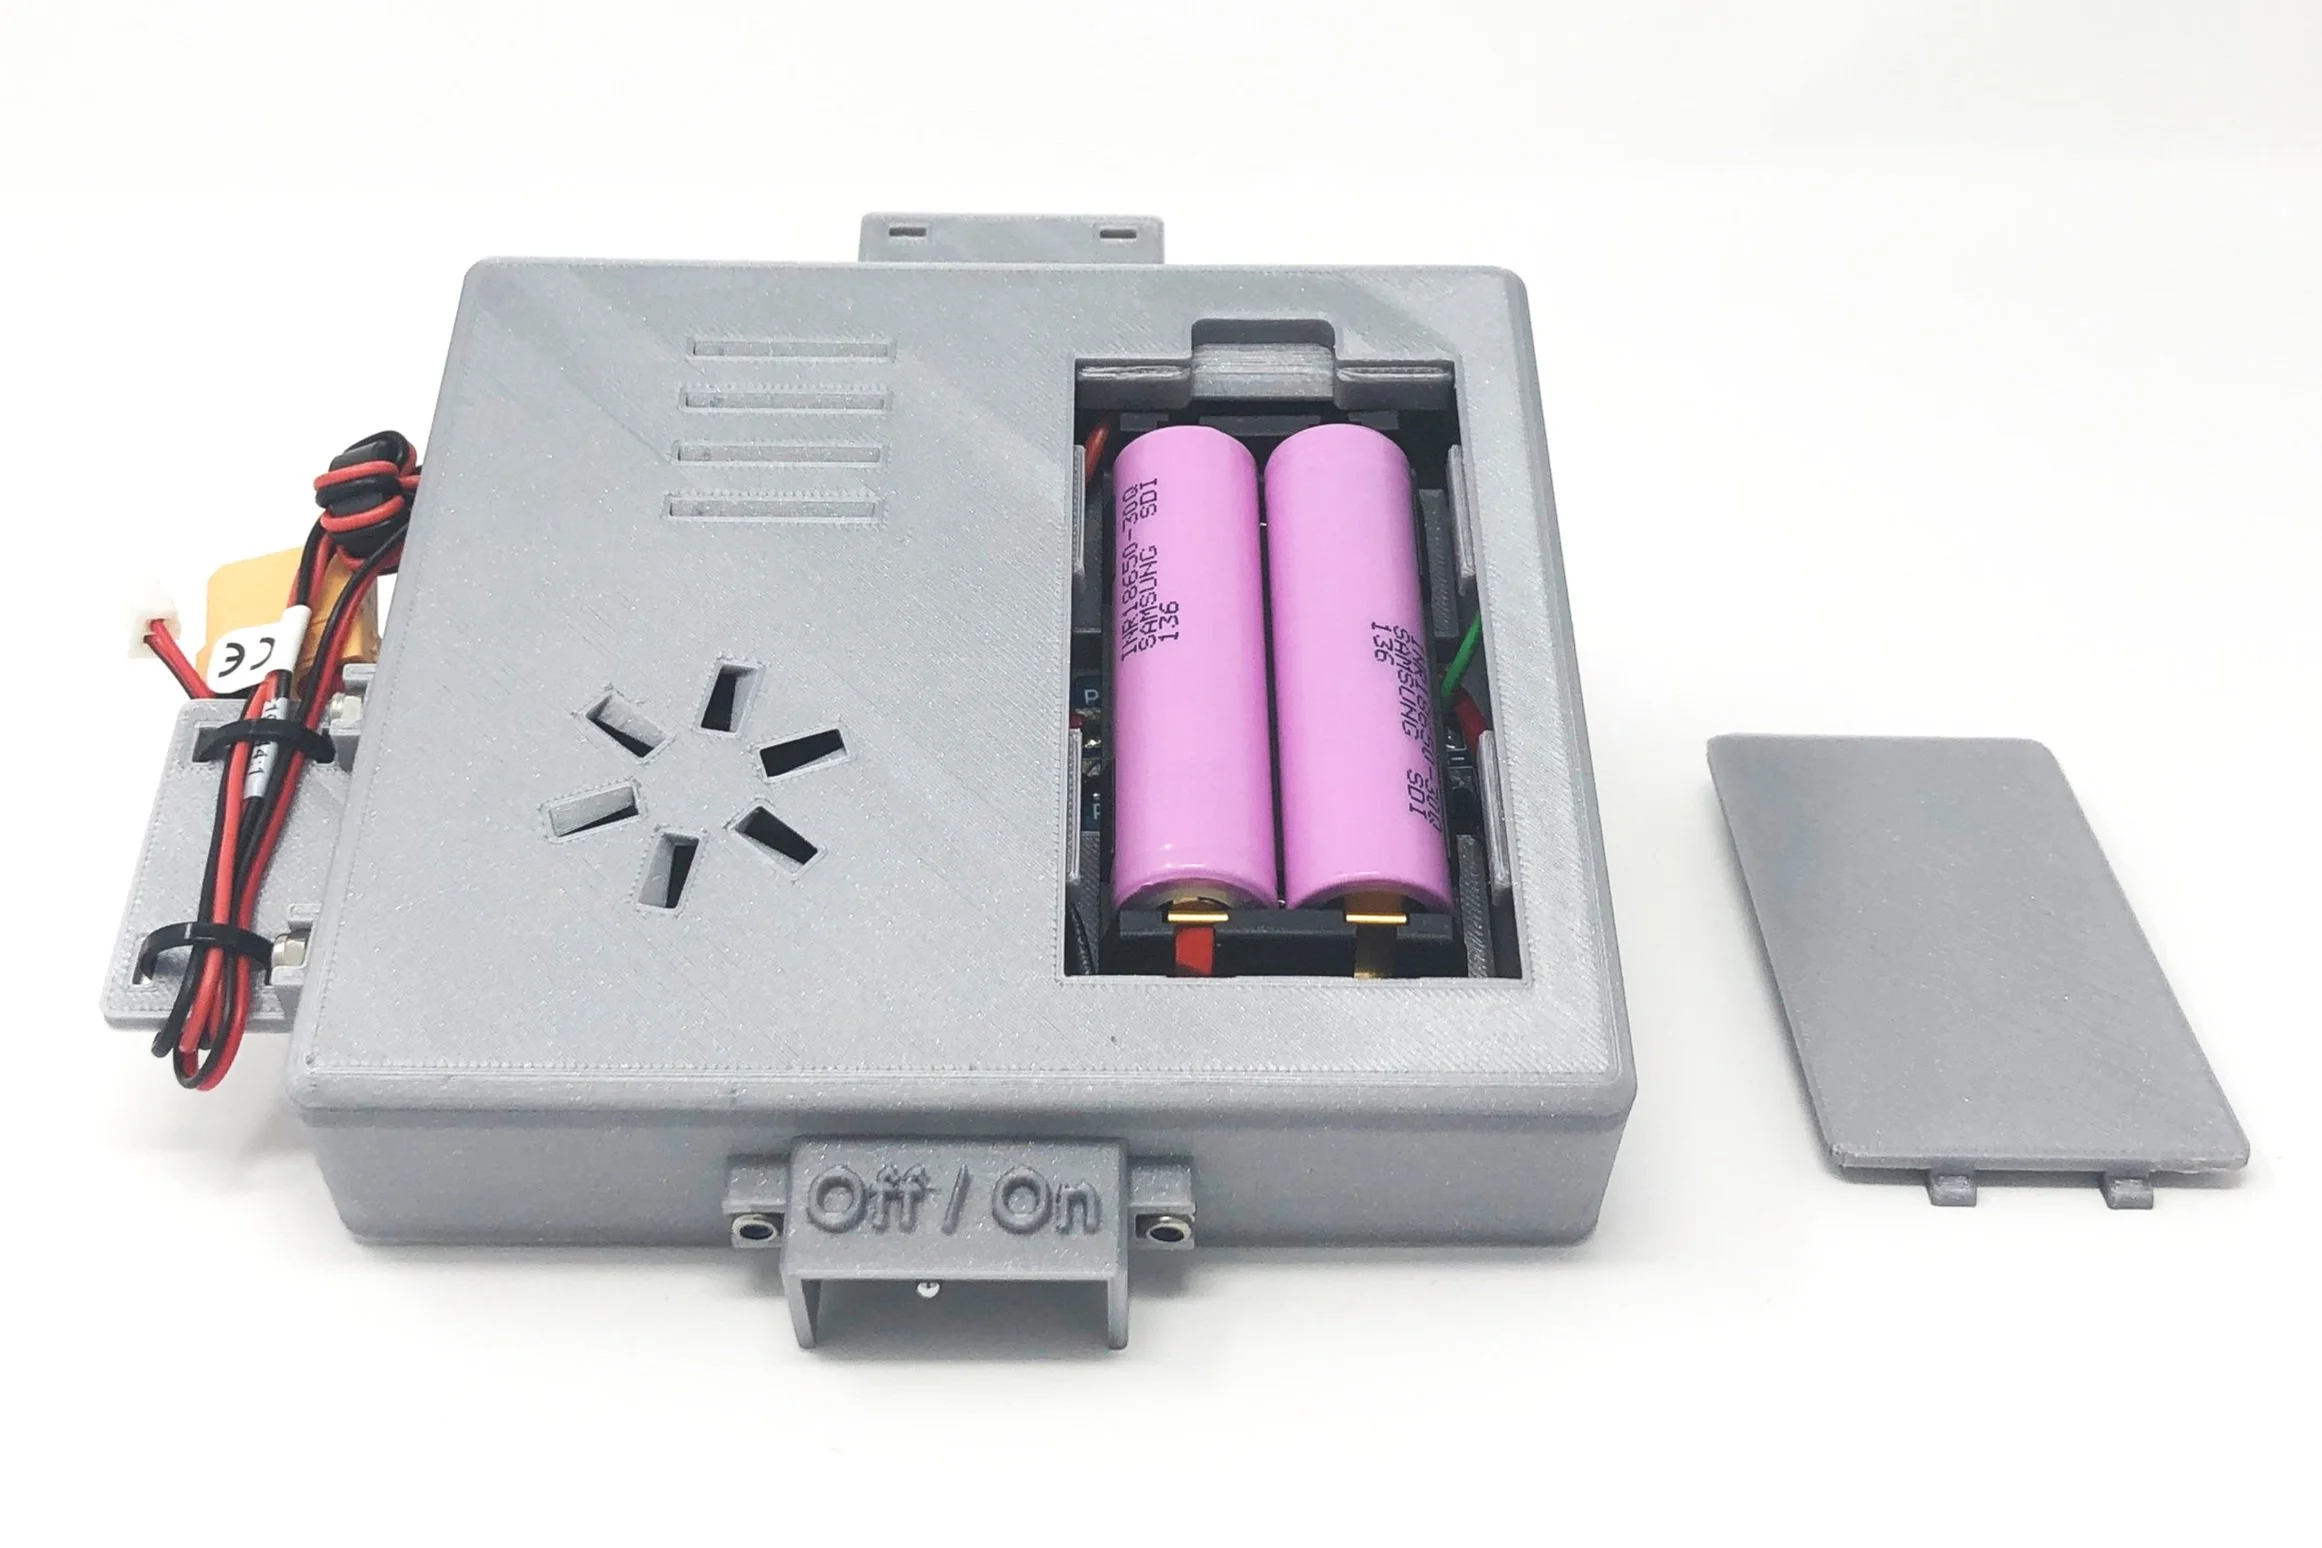
Mounted to the lower back of the jacket are the enclosures for the “Brain” board (wireless receiver and Teensy to translate the wireless MIDI to LED animations) and Battery Power Supply. Both enclosures I designed in Fusion 360 and 3D Printed at home on my Prusa MK3S+.
Brain Board
Custom PCB to hold wireless receiver, Teensy (arduino) for converting MIDI to LED animations, and 5 individually addressable LED strip connections.


Battery Power Supply
2 x 18650 Lithium-Ion batteries (vape batteries), a BMS to provide protection to the batteries and keep them from over discharging, a 5V / 10 Amp power supply, and fan to keep things cool. On/Off switch on bottom.


CHEST PIECE
Probably my favorite part of the entire project was the Chest Piece. I fabricated the enclosure out of acrylic, mounted a bunch of LEDs inside with the help of a small PCB I designed, mounted a second brain board and battery power supply with BMS to the back and then 3D modeled / 3D printed an enclosure around the electronics with mounting hooks that allowed it to be worn as a necklass. The video gives a quick demo of a few animations and how it can be controlled manually with a MIDI controller.


WIRELESS MIDI TRANSMITTER
This is the simplest component of them all. It takes MIDI input and transmits it wirelessly to the Suit and Body Diamond.
I designed a custom PCB with MIDI Input / Thru ports that connects to a wireless transmitter. It also has an Adafruit battery charging circuit board so it can be charged via USB. I put a rather large Lithium-Ion battery in it so that it doesn’t really need to be charged very often. I used an off the shelf enclosure and cut holes in it for the MIDI ports, switch, and USB connector. If I had more time I would have 3D Modeled and 3D Printed a custom enclosure, but this worked just fine.


VIRTUAL VERSION — MIDI CONTROLLED LED SUIT
Due to the short turnaround time required for this project, I knew the suit wasn’t going to be ready until a couple weeks before the band went on tour. So in order to allow them to program the animations for the suit ahead of time, I built a virtual version for Mac OS using the Unity Game Engine. That way they could program their animations in Ableton and get a pretty good idea of what it would look like before the suit arrived.
Here’s a demo of me controlling it live with a MIDI controller plugged into my computer.